Slingshots are lots of fun to use, and relatively simple to create for yourself.
Here’s what you’ll need to create a slingshot yourself:
1. One or two long, thick rubber bands. You can always purchase a slingshot band if you need one!
2. A Y-shaped piece of wood or branch
3. A small piece of leather
4. A Knife
Steps to Make a Slingshot
1. Choose the Right Wood
Select a sturdy, Y-shaped branch, ideally 6–9 inches long with a consistent thickness of 1–2 inches. This size ensures strength and ease of use. Look for wood free of cracks, knots, or bumps, as these can weaken the slingshot over time. If you find minor imperfections, you can sand them down, but avoid wood with cracks, as they may worsen with use.
2. Prepare the Wood
Peel off any bark to create a smooth, comfortable grip. Ensure the wood is fully dry, as dry wood is stronger and more durable for your slingshot.
Select a Strong Band
Find a thick, durable rubber band or tapered elastic band (like surgical tubing) for the firing mechanism. Experiment with the length to find what feels best, but prioritize a strong, robust material for better performance.
3. Cut the Band
If using a single rubber band, cut it in half to create two equal-length pieces for each side of the slingshot. If you’re using surgical tubing or multiple bands, ensure both sides are of equal length for balanced firing.
4. Create the Pocket
Use a rectangular piece of leather, strong cloth, or layered duct tape to make the projectile pocket. Aim for a near-square shape, about 2–4 inches per side, slightly longer in one direction.
5. Add Slits to the Pocket
Carefully cut two slits in the pocket, about 1/4 to 1/2 inch from the shorter edges, parallel to them. Ensure the slits are evenly spaced and just large enough for the rubber band to pass through smoothly without bunching.
6. Attach the Bands to the Pocket
Thread one end of a rubber band through a slit, fold it back to form a small loop, and secure it with a small, sturdy rubber band (doubled or tripled for tightness). Repeat on the other side, ensuring both bands remain equal in length.
7. Secure Bands to the Frame
Attach the free ends of the rubber bands to the Y-shaped wood near the tips of the branches using rubber bands, electrical tape, or by lashing them tightly. Ensure both bands are equal in length for balanced performance.
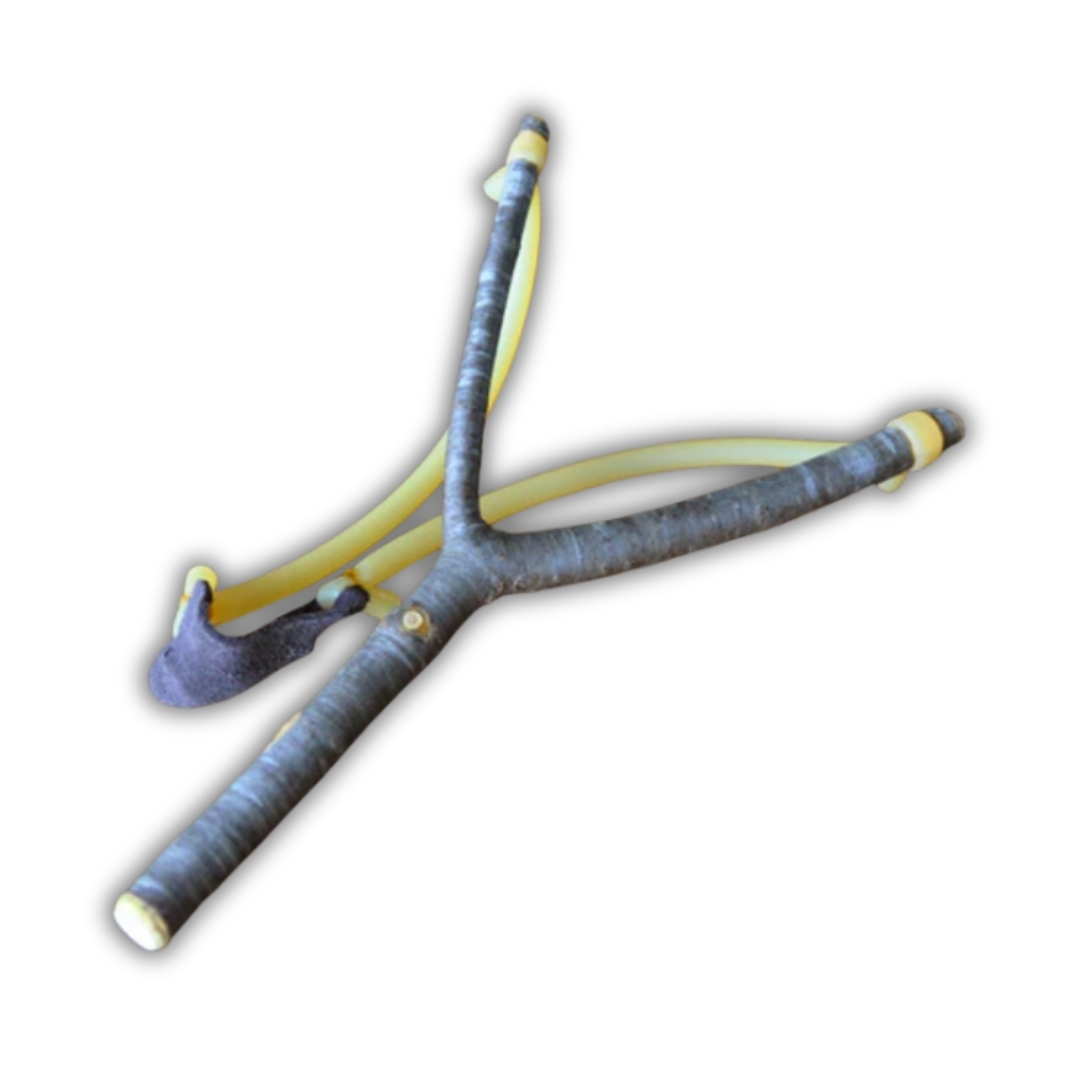
8. Test Your Slingshot
Your slingshot is ready! Use small, safe projectiles like pebbles, rubber balls, or wadded paper. For better accuracy and distance, you can purchase specialized ammunition. Always exercise caution, consider wearing eye protection, and aim responsibly.
Tips for Success
a) Try Surgical Tubing: It’s stronger than standard rubber bands and available at hobby or hardware stores.
b) Improve the Grip: Wrap the handle with tape or twine for comfort and a secure hold.
c) Experiment with Size: Test different branch sizes to find what works best for you.
d) Use Dry Wood: Slowly dried wood is less likely to crack and performs better.
e) Aim Safely: Avoid raising the slingshot to eye level. Instead, hold the pocket near your hip and adjust the frame to aim accurately.
f) Try Headbands: They’re longer and more durable than standard rubber bands.
Safety Reminders Treat your slingshot with care and respect.
- Use strong, intact bands—weak or damaged ones may snap early.
- Never aim at people or animals.
- Wear eye protection to stay safe.
- Ensure the branch is free of rot, as decayed wood can break and cause injury.